Determine Network Availability In A NativeScript With Angular Mobile App
When developing mobile applications, there is often a need to perform certain tasks when a network connection is available. Not only this, but sometimes you only want to perform tasks depending on the type of network connection. For example, what if you wanted to backup large photos only when the Android or iOS device is connected to WiFi rather than 3G or 4G? To accomplish this, we need to determine the network availability and monitor it for changes.
We’re going to see how to check the network connection type and monitor it for changes within an Android and iOS mobile application using NativeScript and Angular.
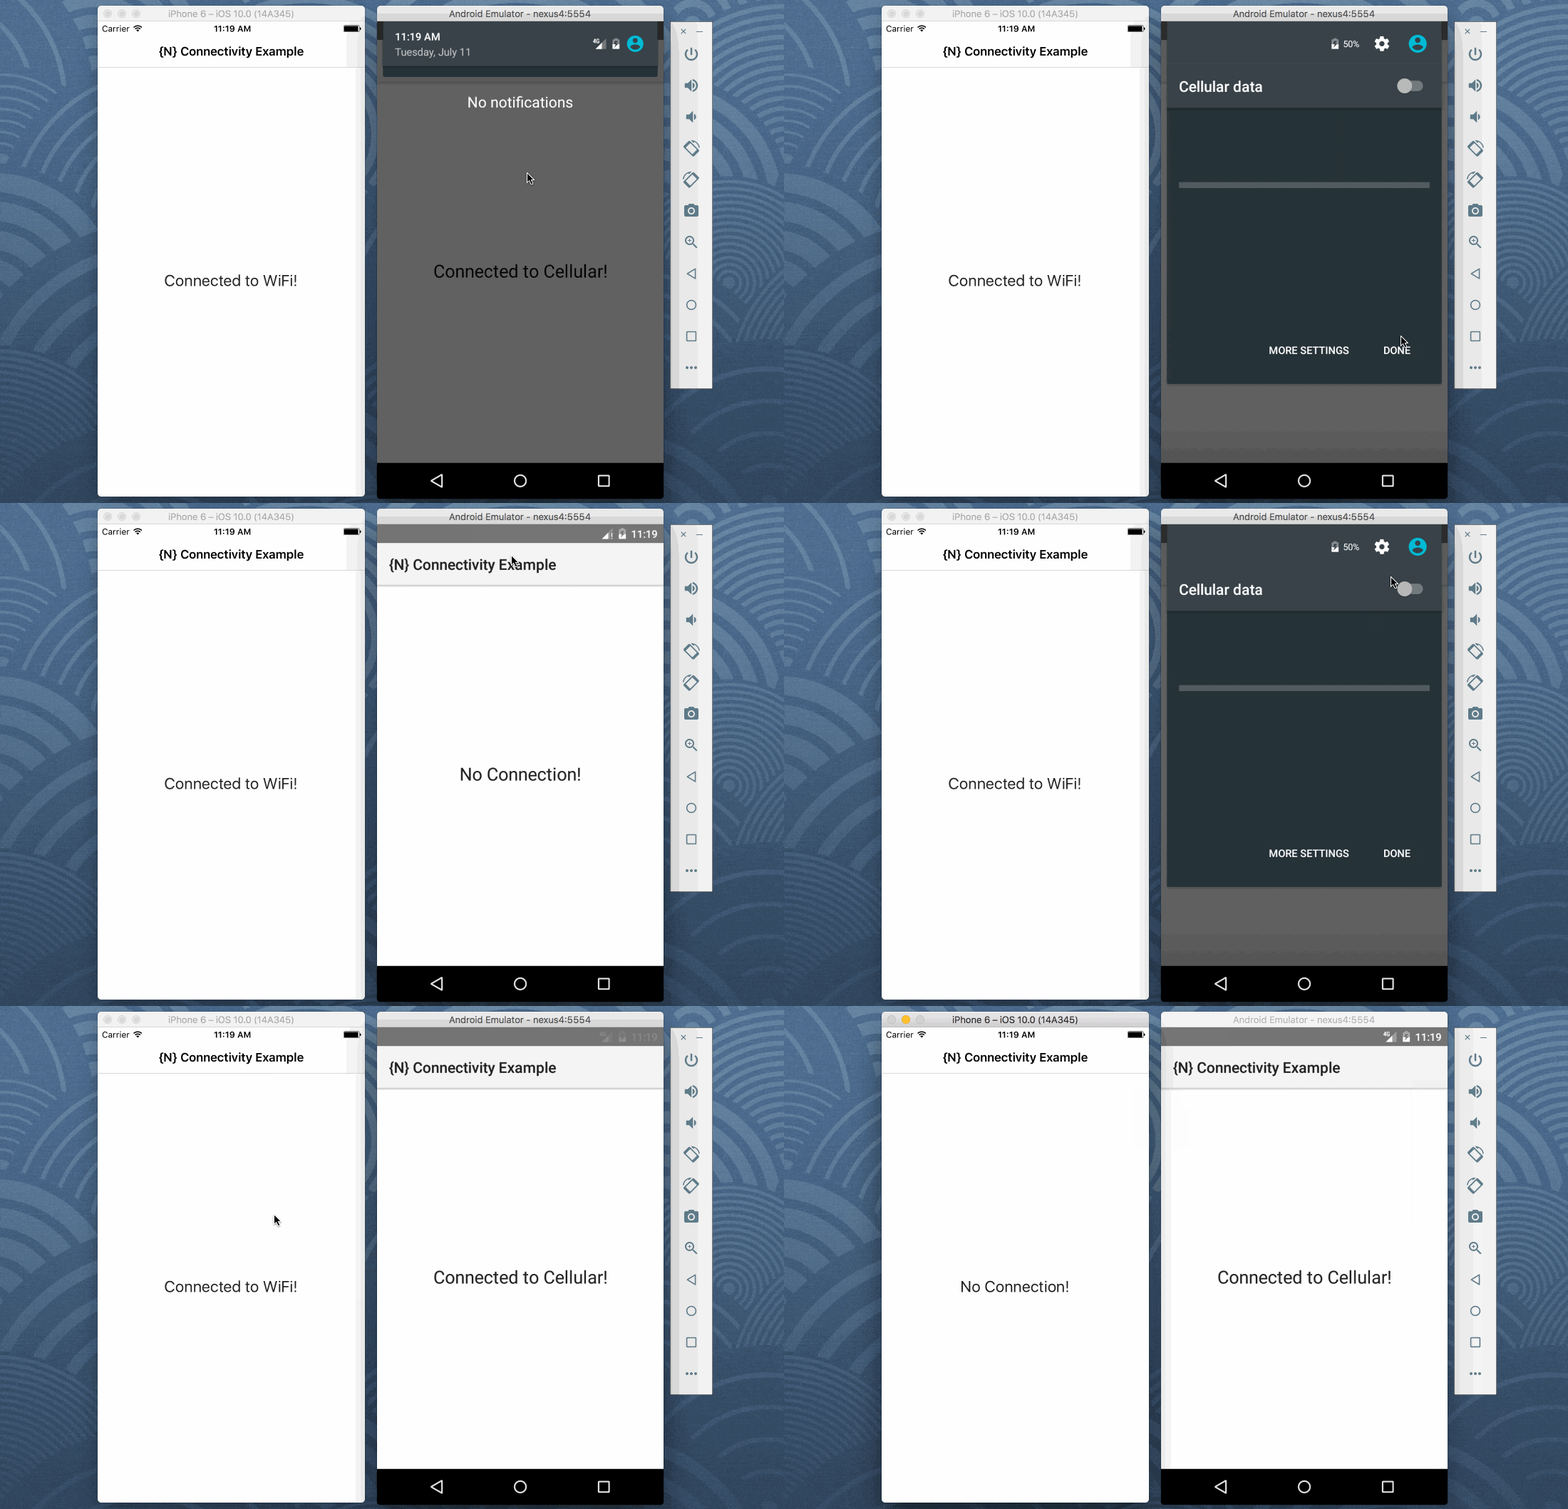
What we want to accomplish is actually quite simple, but yet very useful. Take a look at the animated image below of an iOS and Android simulator.

We want to be able to display the connection type and change it when the connectivity changes.
Create a New NativeScript with Angular Project
To keep things easy to understand, we’re going to create a fresh NativeScript project that uses Angular. Assuming you already have the NativeScript CLI installed, execute the following:
tns create network-project --ng
The --ng flag in the above command indicates that we are working with Angular rather than a NativeScript Core project.
The base template that ships with new NativeScript projects is actually way more than we need. For this reason, it makes sense to strip out some of the components and services that we won’t be using.
Open the project’s app/app.routing.ts file and make it look like the following:
import { NgModule } from "@angular/core";
import { NativeScriptRouterModule } from "nativescript-angular/router";
import { Routes } from "@angular/router";

const routes: Routes = [];

@NgModule({
    imports: [NativeScriptRouterModule.forRoot(routes)],
    exports: [NativeScriptRouterModule]
})
export class AppRoutingModule { }
Notice we’ve removed all reference to the other components that had existed in our project. We want to do the same in the project’s app/app.module.ts file. Open it and make it look like the following:
import { NgModule, NO_ERRORS_SCHEMA } from "@angular/core";
import { NativeScriptModule } from "nativescript-angular/nativescript.module";
import { AppRoutingModule } from "./app.routing";
import { AppComponent } from "./app.component";

@NgModule({
    bootstrap: [
        AppComponent
    ],
    imports: [
        NativeScriptModule,
        AppRoutingModule
    ],
    declarations: [
        AppComponent
    ],
    providers: [],
    schemas: [
        NO_ERRORS_SCHEMA
    ]
})

export class AppModule { }
We’re doing this cleanup to prevent any errors related to routing which we’re not making use of in this example. To learn how to navigate between pages in NativeScript, check out a previous tutorial I wrote about here.
At this point we can start adding our network connectivity logic and simple user interface.
Developing the Network Application Logic and Simplistic UI
There are two aspects to network connectivity or availability in a NativeScript application. There is the determination aspect as well as the monitoring aspect. We’re going to take a look at both.
Open the project’s app/app.component.ts file and include the following TypeScript logic. We’re going to break it down after.
import { Component, OnInit, NgZone } from "@angular/core";
import * as Connectivity from "tns-core-modules/connectivity";

@Component({
    selector: "ns-app",
    templateUrl: "app.component.html",
})

export class AppComponent implements OnInit {

    public connectionType: string;

    public constructor(private zone: NgZone) {
        this.connectionType = "Unknown";
    }

    public ngOnInit() {
        this.connectionType = this.connectionToString(Connectivity.getConnectionType());
        Connectivity.startMonitoring(connectionType => {
            this.zone.run(() => {
                this.connectionType = this.connectionToString(connectionType);
            });
        });
    }

    public connectionToString(connectionType: number): string {
        switch(connectionType) {
            case Connectivity.connectionType.none:
                return "No Connection!";
            case Connectivity.connectionType.wifi:
                return "Connected to WiFi!";
            case Connectivity.connectionType.mobile:
                return "Connected to Cellular!";
            default:
                return "Unknown";
        }
    }

}
The Connectivity module is already available to use without having to install any third-party plugin. After importing it, we should set up some kind of mapping between the values and something human readable.
public connectionToString(connectionType: number): string {
    switch(connectionType) {
        case Connectivity.connectionType.none:
            return "No Connection!";
        case Connectivity.connectionType.wifi:
            return "Connected to WiFi!";
        case Connectivity.connectionType.mobile:
            return "Connected to Cellular!";
        default:
            return "Unknown";
    }
}
The module itself will give us a numeric value which we can pass into our connectionToString function for a string instead.
This brings us to the ngOnInit method:
public ngOnInit() {
    this.connectionType = this.connectionToString(Connectivity.getConnectionType());
    Connectivity.startMonitoring(connectionType => {
        this.zone.run(() => {
            this.connectionType = this.connectionToString(connectionType);
        });
    });
}
The first thing we do is get the current internet connection setting. After, we start monitoring which will listen for changes. When a change is detected, our connectionToString function will be called and the public variable that we are planning to bind to the UI will be updated.
There is a catch though. Because we’re working with listeners in Angular, we need to make sure we’re in the proper zone. If we’re not in the proper zone, the UI won’t be updated from within the listener. This is where the NgZone comes into play.
The UI behind this application is incredibly simple. Open the project’s app/app.component.html file and include the following XML markup:
<ActionBar title="{N} Connectivity Example"></ActionBar>
<GridLayout>
    <Label text="{{ connectionType }}" class="h2 text-center" verticalAlignment="center"></Label>
</GridLayout>
In the above XML we’re just centering text on the screen representing our bound variable from the TypeScript code. Nothing really to it.
We’re not done though.
Android won’t let us check the network state unless we add permissions for it. As of right now, iOS doesn’t have this permission related issue.
Open the project’s app/App_Resources/AndroidManifest.xml file and include the following line:
<uses-permission android:name="android.permission.ACCESS_NETWORK_STATE"/>
The above line can be placed alongside the other permissions that were declared in the application.
Conclusion
You just saw how to determine network availability, or in other terms, check for an internet connection, using NativeScript and Angular. Again, this is very useful if you need to determine the connection type before performing network heavy tasks, or network tasks at all.
A video version of this article can be seen below.

