Connect To A Raspberry Pi And Pi Zero With A USB To TTL Serial Cable
When it comes to configuring a Raspberry Pi for the first time, there are a few options, many of which can be a pain. This includes configuration of a Raspberry Pi and the smaller Pi Zero. Previously I had written about using a Raspberry Pi as a headless unit, but in that tutorial there was an ethernet requirement. Recently I had written about connecting to a Pi Zero through a standard micro USB cable and SSH, which wasn’t difficult, but it required a few potentially time consuming steps.
Is there a better way to connect to and configure these Internet of Things (IoT) devices?
I wouldn’t necessarily call it a better way, but more of another option towards Raspberry Pi configuration. You can actually connect to the Raspberry Pi and Pi Zero through the available GPIO pins with a USB to TTL serial cable. We’re going to see how to do that.
Going forward, you should note a few things. First off, this was inspired by the Adafruit guide for using a console cable. It didn’t exactly work for me, but it put me on the correct path. I’ll be making a few references to my Raspberry Pi Zero’s GPIO pins, but you should note that in most scenarios, the Pi Zero does not ship with a GPIO header attached. I soldered mine on, and as a first time solderer, it wasn’t so bad.

In the above images you’ll see the GPIO pins on various Raspberry Pi units. The pin configuration is the same for all Raspberry Pi devices regardless the shape, size, or version. You’ll also note the cable we’re going to be using to connect. Let’s break down what the full specs of what we’ll need to be successful.
The Requirements
There are only a few requirements towards being successful with this project. They are found below with a link to purchase them:
- Raspberry Pi or Raspberry Pi Zero
- Male 2×20, 40-pin headers (Pi Zero)
- USB to TTL serial cable
This guide won’t show you how to solder your own headers, so if you’re not comfortable with the task, you should probably stick with a standard Raspberry Pi. If you haven’t already flashed your Raspberry Pi micro SD card, you can see how to do this here. No need to go through the other steps after installing Raspbian Linux.
Preparing Your Computer for Terminal Emulation
When working with the GPIO, you’ll need special drivers. Using the Terminal or PuTTY on Windows isn’t enough to get the job done.
I’m using a Mac, so I won’t be of much help in the realm of Windows and Linux, but from what I understand, the process isn’t too different. On Mac, download the following chipset drivers:
Installing both is safe, but if you know exactly what chipset you’re using, then go for the specifics. When it comes to Linux and Windows, head over to the Prolific and SiLabs websites to get what you need, or get the specifics from Adafruit.
With the computer software ready to go, we need to make some change to our Raspbian setup.
Enabling UART Mode on the Raspberry Pi
At this point we haven’t connected to our Raspberry Pi yet. It is alright if you’re not using a fresh installation.
Insert the micro SD card into a computer and open the mounted boot drive. At the root of this drive should be a file called config.txt. We need to add a particular line to the end of this file to enable UART mode.
enable_uart=1
After the above line has been added, it is safe to plug the card into the Raspberry Pi device that you plan to use. The configurations are now complete and it is time to wire up the unit and connect via your Terminal or PuTTY.
Connecting the Colored Wires to the GPIO Header
Before we start connecting wires, we need to be aware of something. One wire on the serial cable is responsible for powering the Raspberry Pi. If we decide to use this wire, and it is optional, we absolutely must not plug in a standard USB power cable. Providing two sources of power will break your unit.
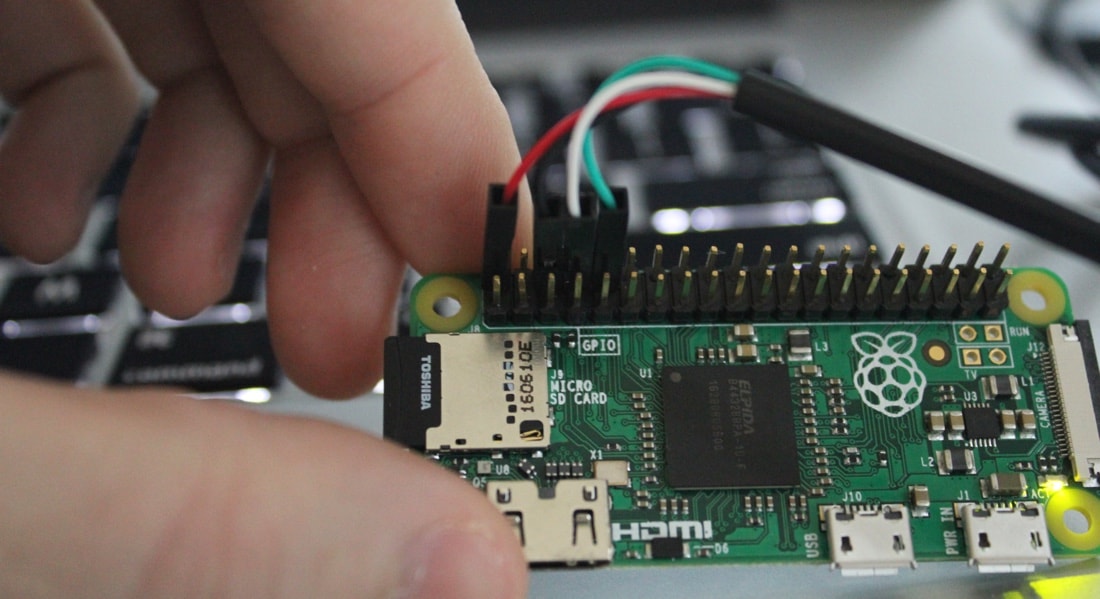
With that said, your TTL serial cable should have four colored wires with the red wire being for power. The cable configuration should look like the following:

The red wire, if used, should be plugged into the first pin on the upper level. We’re going to assume the upper level is the row closest to the edge of the Raspberry Pi. The black wire should be attached to the third pin, the white on the fourth pin, and the green on the fifth pin. All pins should be on the upper level.
Once connected, insert the USB into a computer or other compatible power source.
Connecting to the Raspberry Pi with the TTL Serial Cable
By now the cables should be connected and the emulation software should be installed. We just need to establish the connection via the software now.
I’m on a Mac, so I haven’t been able to verify connecting via a Microsoft Windows or Linux computer. On a Mac, open the Terminal and execute the following:
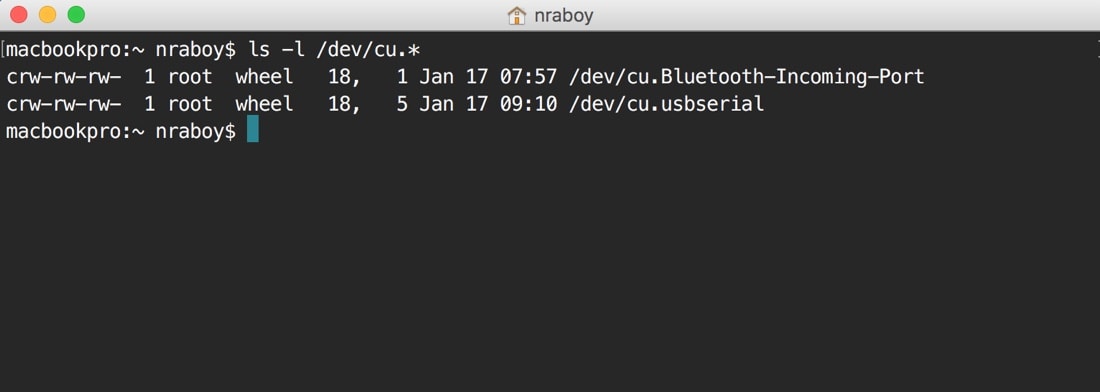
screen /dev/cu.usbserial 115200
This command differs to the commands I’ve seen elsewhere on the internet. To be fair, I am running El Capitan (10.11.6), but I think it will be consistent through the different versions as well. If you don’t have /dev/cu.usbserial on your machine, see what other /dev/cu.* files you have and execute what is appropriate.

After connecting, if you see a blank screen, don’t worry. Just hit the enter key and the shell information should appear on the screen prompting you to sign in.
As of right now, the first-time credentials for Raspbian will be pi as the username and raspberry as the password.
For Linux and Windows, I encourage you to visit the Adafruit educational website to see if their instructions remain valid.
Conclusion
You just saw how to connect to your Raspberry Pi and Pi Zero using the GPIO pins and a USB to TTL serial cable, an alternative to using Ethernet, USB emulation, and a separate screen. If you’re interested in connecting to a Pi Zero without a header, you might check out my other tutorial on the subject of SSH over USB. Likewise, if you’d like to use Ethernet on a standard Raspberry Pi unit, you can check out how to configure a headless unit.
This guide does contain affiliate links to the products I used. While you don’t have to use the same products that I used, it would support this blog if you did.

