Using Local Notifications In Your Ionic 2 Mobile App
A little more than a year ago I wrote a tutorial regarding using local notifications in an Ionic Framework Android and iOS application, but Ionic Framework and AngularJS is rapidly becoming a thing of the past. Lately, anything Angular is all the rage and that includes frameworks that use it like Ionic 2. This inspired me to update my previous tutorial for the latest and greatest.
Let’s take a step back though. Why would one want to use local notifications in their mobile application? Well, one example might be in iBeacon detection. An iBeacon comes into range and a notification might show. That is just one of many examples. Let’s also not confuse local notifications with push notifications. Local notifications have no interaction with a service like Firebase Cloud Messaging (FCM) or Apple Push Notification Service (APNS).
We’re going to see how to schedule notifications and perform tasks based on various actions around the notifications.
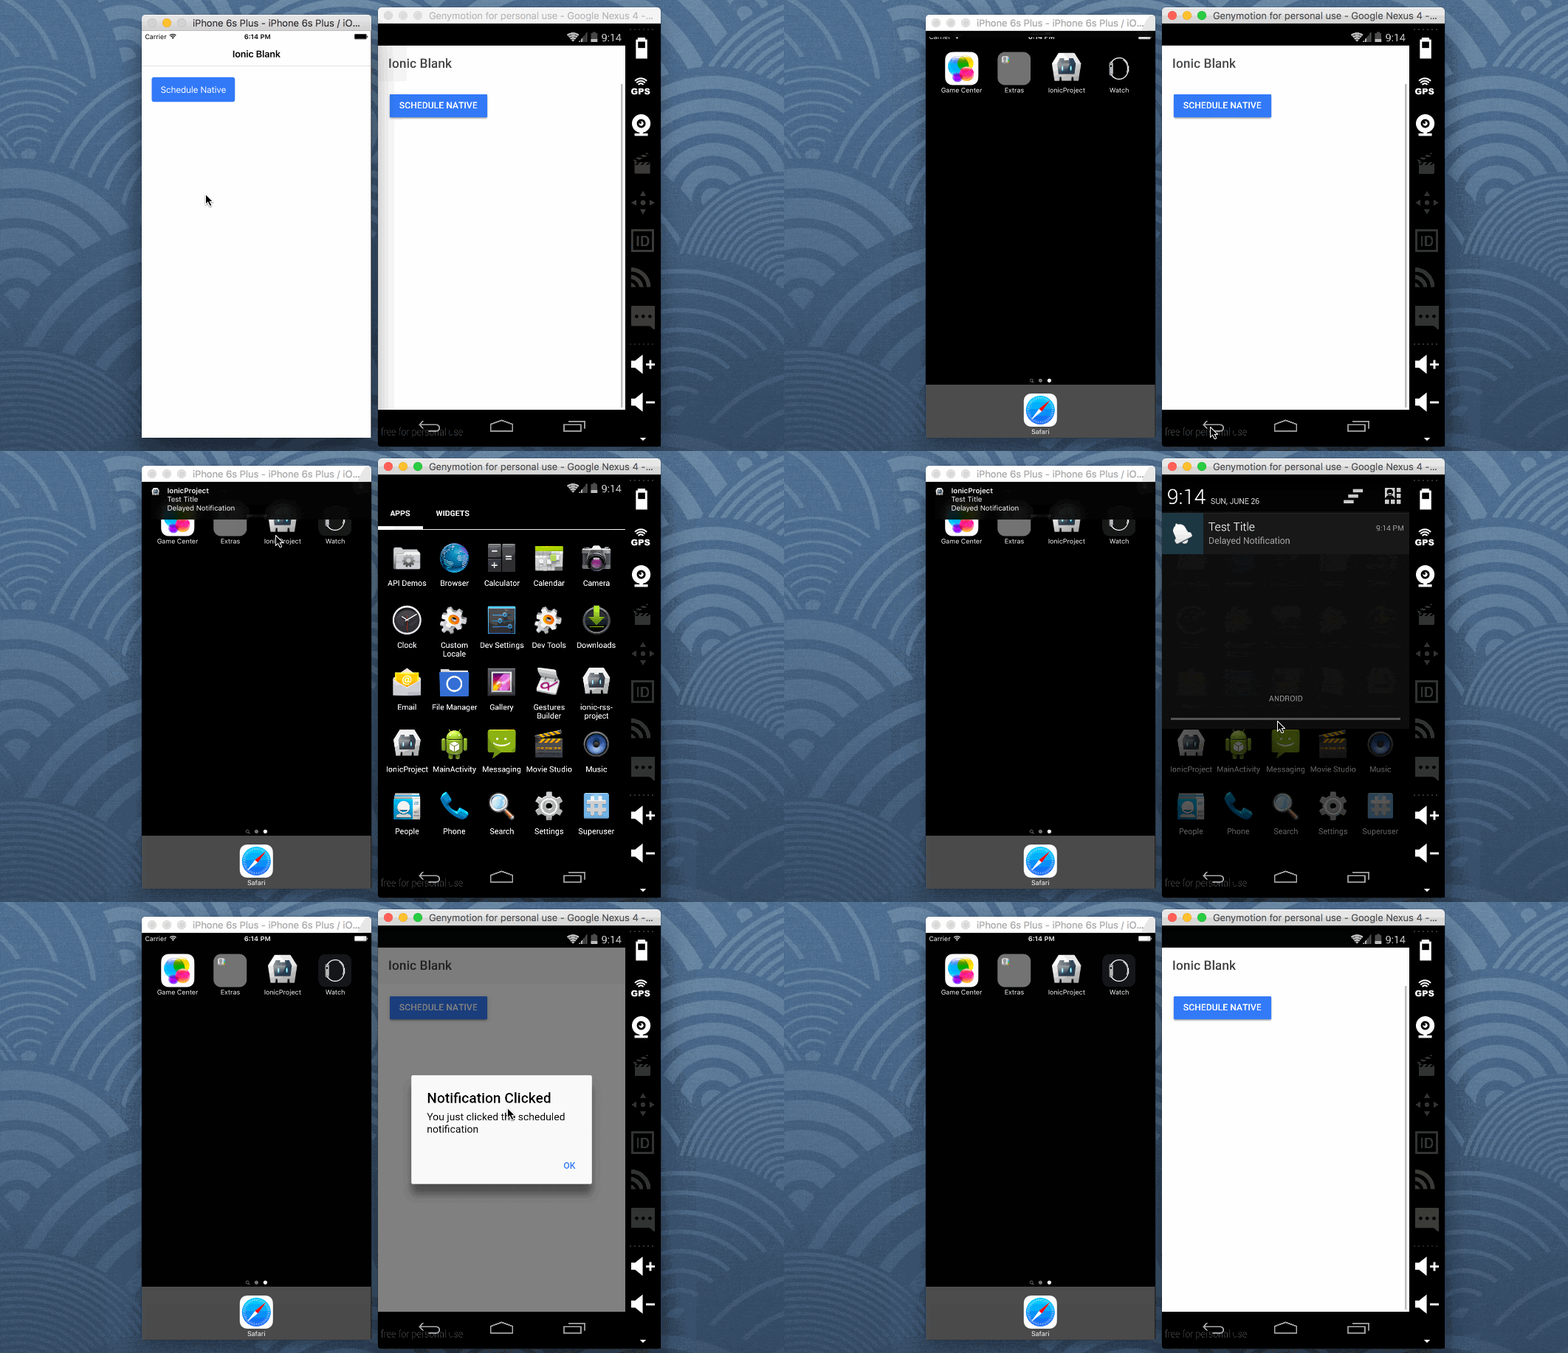
The application that we’re going to build is very simple. We’re going to allow notifications to be scheduled five seconds in the future. When these notifications are clicked, we’ll open the application and show an alert message. Something like the animated image below.

To make this project simple, we’re going to create a fresh Ionic 2 project for Android and iOS. From your Command Prompt (Windows) or Terminal (Mac and Linux), execute the following:
ionic start NotifyProject blank --v2 --typescript
cd NotifyProject
ionic platform add ios
ionic platform add android
A few things to note in the above commands. The --v2 and --typescript tags mean that we’re going to be creating an Ionic 2 project that uses TypeScript. For this to be possible you need to have the Ionic 2 CLI, not the standard Ionic CLI. Second, you’ll notice that I’m adding the iOS platform. You won’t be able to build for iOS unless you have Xcode installed.
With our project created we need to add the plugin responsible for local notifications. We’re going to use the Apache Cordova local notifications plugin by Sebastián Katzer. To add this plugin, execute the following:
ionic plugin add de.appplant.cordova.plugin.local-notification
Time to get down to business in our application.
Most of our development will be TypeScript oriented, with a slight bit of HTML markup. Let’s start with the TypeScript logic. Open the project’s app/pages/home/home.ts file and include the following code:
import {Component} from "@angular/core";
import {NavController, Alert} from 'ionic-angular';
import {LocalNotifications} from 'ionic-native';

@Component({
    templateUrl: 'build/pages/home/home.html'
})
export class HomePage {

    constructor(private navController: NavController) {
        LocalNotifications.on("click", (notification, state) => {
            let alert = Alert.create({
                title: "Notification Clicked",
                subTitle: "You just clicked the scheduled notification",
                buttons: ["OK"]
            });
            this.navController.present(alert);
        });
    }

    public schedule() {
        LocalNotifications.schedule({
            title: "Test Title",
            text: "Delayed Notification",
            at: new Date(new Date().getTime() + 5 * 1000),
            sound: null
        });
    }

}
Let’s break down what is happening in the above code.
We’re importing a few components. We’re importing NavController and Alert for displaying alert dialogs and we’re importing LocalNotifications because we’re going to use Ionic Native to assist with the Apache Cordova plugin.
This brings us to the HomePage class.
Inside the constructor method we are defining any events associated to the notifications. Think of them as listeners that we’re configuring. In this case we’re looking out for the click event and showing an alert if it happens.
Finally this takes us to the schedule method. In it we define some basic things and set the schedule to be five seconds from now. Nothing particularly complicated.
Now we can take a look at the HTML markup that goes with the TypeScript logic. Open the project’s app/pages/home/home.html file and include the following markup:
<ion-header>
    <ion-navbar>
        <ion-title>Ionic 2 Notifications</ion-title>
    </ion-navbar>
</ion-header>

<ion-content padding>
    <button primary (click)="schedule()">Schedule</button>
</ion-content>
We really just have a single button that calls our schedule method.
Conclusion
We just saw how to use local notifications in an Ionic 2 iOS and Android application. Local notifications are different from push notifications because they don’t deal with a server. There are plenty of other events that I didn’t show that you can see in the official plugin documentation. If you’re looking for local notifications in an Ionic Framework 1 application, check out a previous article I wrote on the topic.

