Make HTTP Requests In An Ionic Android And iOS App
Anyone looking to build a mobile application is going to find themselves needing to make HTTP requests to some remote web service at some time. It is just how the modern web and modern app development process is now. Previously I had demonstrated how to make HTTP requests in an Ionic Framework 1 application, but since Ionic 2 is all the rage right now, we’re going to switch gears and see how it is done in the latest framework version.
The bulk of this tutorial will be demonstrating how to make these web service requests in Angular since it is fairly different from the first AngularJS version.
Let’s work on an actual Ionic 2 example. Start by creating a fresh project from your Terminal (Mac and Linux) or Command Prompt (Windows) like so:
ionic start ExampleProject blank --v2
cd ExampleProject
ionic platform add ios
ionic platform add android
A few things to note about project creation. If you’re not using a Mac you won’t be able to add and build for the iOS platform. You’ll also need to be using the Ionic CLI that supports Ionic 2 applications.
We won’t be using any Apache Cordova plugins in this example so we can jump right into our project. However, first let’s determine which HTTP service we are going to test against. A convenient service, httpbin, allows for testing web requests.
We’re going to make GET requests against https://httpbin.org/ip and POST requests against https://httpbin.org/post.
This application will be simple. It will have two buttons, one for GET requests and one for POST requests. Starting with the app/pages/home/home.js file, change the code to look like the following:
import {Page, Alert, NavController} from 'ionic/ionic';
import {Http} from 'angular2/http';

@Page({
    templateUrl: 'build/pages/home/home.html',
})

export class HomePage {
    constructor(http: Http, nav: NavController) {
        this.http = http;
        this.nav = nav;
    }

    makeGetRequest() {
        this.http.get("https://httpbin.org/ip")
        .subscribe(data => {
            var alert = Alert.create({
                title: "Your IP Address",
                subTitle: data.json().origin,
                buttons: ["close"]
            });
            this.nav.present(alert);
        }, error => {
            console.log(JSON.stringify(error.json()));
        });
    }

    makePostRequest() {
        this.http.post("https://httpbin.org/post", "firstname=Nic")
        .subscribe(data => {
            var alert = Alert.create({
                title: "Data String",
                subTitle: data.json().data,
                buttons: ["close"]
            });
            this.nav.present(alert);
        }, error => {
            console.log(JSON.stringify(error.json()));
        });
    }
}
A few important things going on here.
First we are importing Angular’s HTTP dependency. With it imported we can set it in our constructor so it can be used in our other two functions. The constructor runs when the page loads.
The UI view to compliment this logic can be found in the app/pages/home/home.html file. Open it and change the code to look like the following:
<ion-navbar *navbar>
    <ion-title>
        Home
    </ion-title>
</ion-navbar>

<ion-content class="home">
    <button (click)="makeGetRequest()">GET Request</button>
    <button (click)="makePostRequest()">POST Request</button>
</ion-content>
Nothing fancy in this UI file.

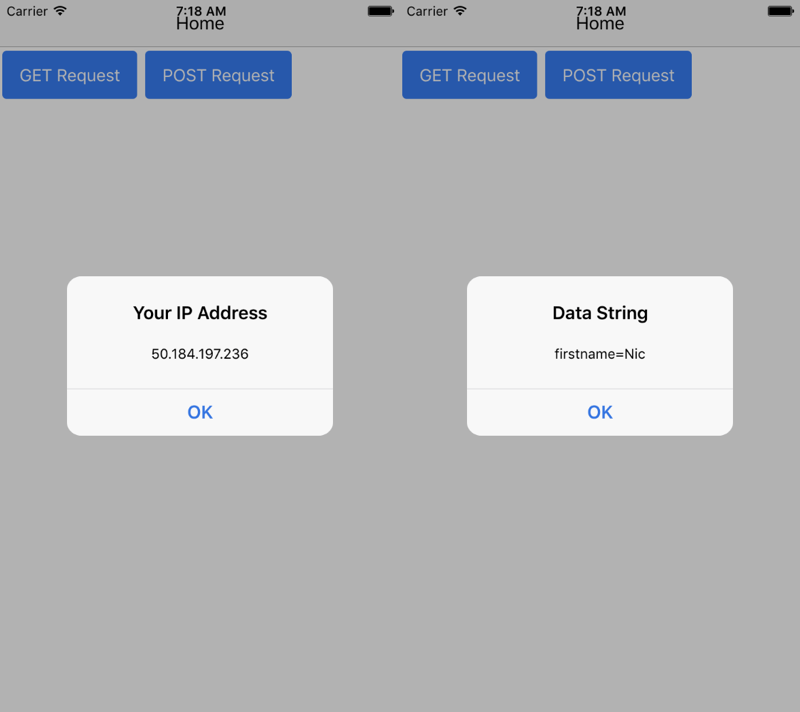
The GET request will show an alert with the requestors IP and the POST request will show an alert with the body data sent.
For reference, an Angular POST with “the works” might look like this:
http.post(url, body, {
    headers: { }
})
.subscribe(success => {
    // A success response
}, error => {
    // An error happened
}, () => {
    // Finally do something here
});
You can include a POST body and specific headers to the request.
Conclusion
We just saw how to make HTTP requests using Ionic 2. Although similar to making HTTP requests with Ionic Framework 1, how Angular does things is a little different. These requests are a necessity when working with web service APIs like, but not limited to, Google and Facebook.

